
If we had to pick one sure-fire giveaway that you’re a restoration enthusiast, our money would be on how you feel about radiators. These beauties utterly transform a space and add bags of character when they’re reintroduced to a period home. They’re also a huge labour of love and we’d be willing to place another bet that anyone who’s embarked on a radiator project has spoken some choice words before falling back in love with them when they’re in pride of place.
If you’re ready to take the plunge, renovating period radiators is a fabulous way of showcasing your individuality and love of original features. This month’s blog is a handy how-to of the steps to restore radiators, what to do yourself, and when you might want to bring in the experts.
1. Considerations
Before you start, make sure you speak to a plumber to check what size you need to sufficiently heat your room. They will be able to advise on the number of BTUs (British Thermal Units) you need based on the square footage to be heated.
You should also budget for safety checks and installation (and removal) costs. As a guide, to replace all radiators in a typical 2-bedroom terrace house would take around 2 days, including removing old units and repositioning pipes as required. Also check that your plumber will dispose of your old radiators.
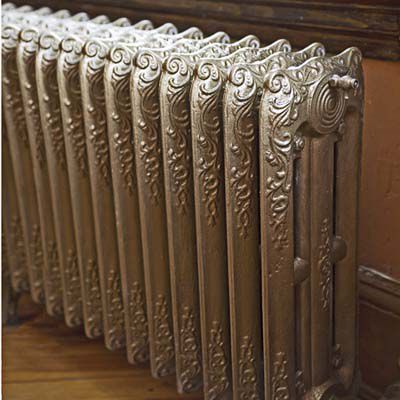
2. Choosing your radiator
At Dorton, we stock a huge variety and styles, from ornately sculpted to industrial radiators. We also sell repro radiators if you like the steam-punk look but don’t fancy taking on a labour-intensive project.
3. Stripping your radiators
One of the joys of original radiators is their age and providence; the downside is that beautiful features are often covered in years’ worth of paint. Stripping them is labour-intensive and you need to consider the best way to approach it. First, make sure that you’re working in an unoccupied space (or ideally, outdoors), because this is a messy task!
You can strip a radiator by hand but this is time-consuming. You may want to do it in stages – use a wire brush to scrape off as much as possible, then sand blast the unit, and finally remove the last of the stubborn paint with a nitrate paint remover. If you’re using a sand blaster, you may want to think about sending it away to an expert.
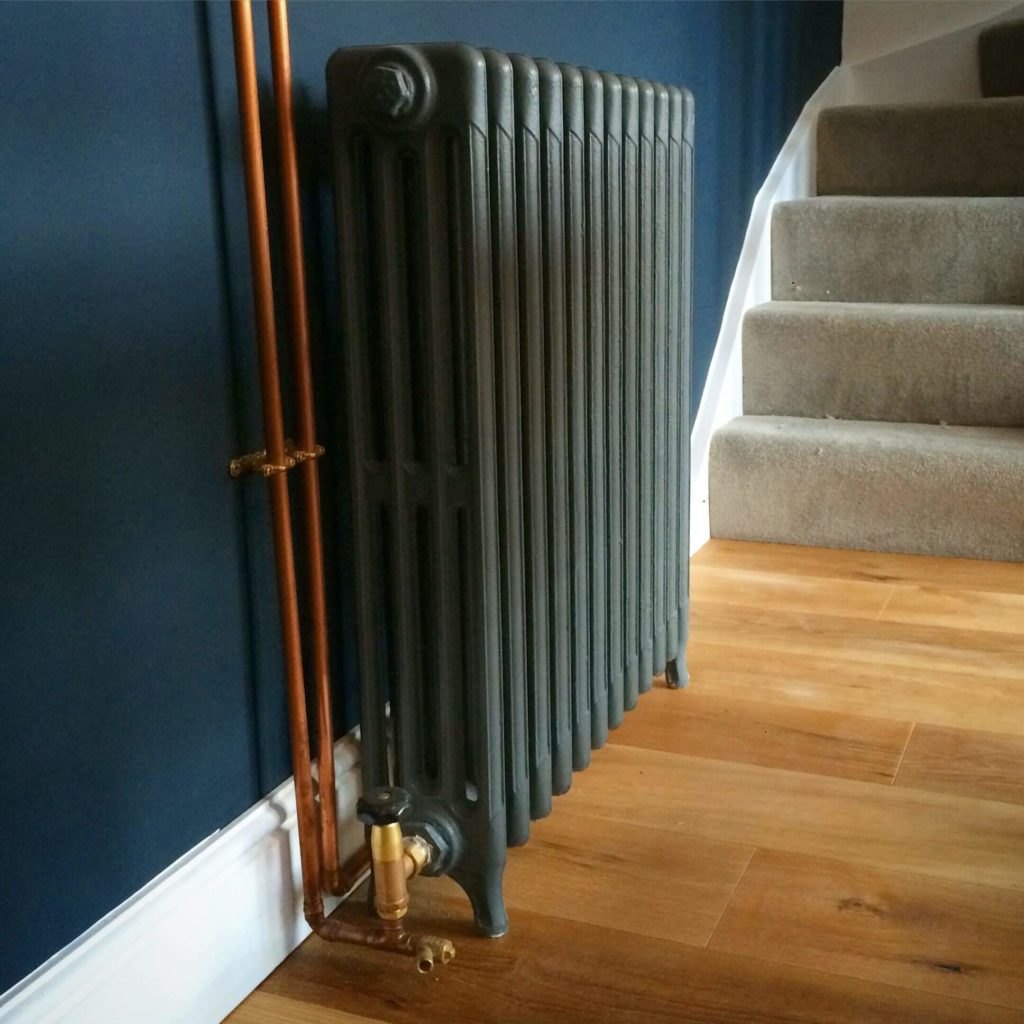
4. Varnishing, polishing, painting
You’ll need to prime and then varnish or paint your radiator to bring it back to its former glory. We love this chic style, achieved with Farrow and Ball paint contrasting with copper piping.
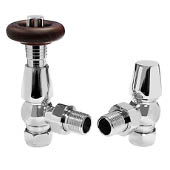
5. Finishing touches
Your plumber should supply the pipes to install your new radiator and connect to existing pipework. Complete the look with period style taps and valves – we love these:
Once you’re done, all that’s left is to crank up the heat and enjoy the results of all your hard work.
It’s always worth a visit to our yard to see what’s new, and make sure you sign up to our pre-claim service, where you’ll be the first to hear about new and unusual finds.
Image references
Lead image Enki Magazine
Olive green painted radiator Pinterest
Ornate radiator This old house
Valves Victorian Plumbing